Google Meet Bots: Getting Started
Learn how to create bots to start recording your Google Meet calls automatically.
Overview
Charlybot requires access to your Google Meet sessions to record them. This guide will walk you through the necessary steps to set up the authentication and start recording your Google Meet calls.
Prerequisites
- A Charlybot account
- Access to a Google Workspace account with Google Meet (This has to be a Google professional account, not a personal Google account)
- To use our Postman collection you will need the Postman desktop app to save the your API Key in the vault (See image on Step 4)
Your API Key
Please log in to view your API key.
Setting Up Google Meet Authentication
Step 1: Setup your Charlybot account
If you don't have a Charlybot account please contact us at [email protected].
- You will receive an email with a API Key and your account details.
Step 2: Create a Google Login Group
A login group stores references to multiple logins(Google accounts). This allows Charlybot to perform a round robin allocation and avoid hitting concurrency limitations for authenticated accounts.
- Use the Create Login Group endpoint to create a new login group
- When the bot joins the call, it will use a login(Google account, will be setup in Step 4) from the login group to authenticate itself.
Step 3: Create a new Google Workspace
The bot uses SSO based authentication and in order to proceed you need to create a new dedicated Google Workspace.
- You can use any domain, either a new domain that you register for this purpose, or a subdomain of your primary domain. For instance sso.yourcompany.com. You cannot reuse your existing Google Workspace if you already have one. The reason is because this method relies on the organization-wide SSO policy which will break login for all accounts on your existing Google Workspace.
- You can use email like [email protected] to sign up for the dedicated Google workspace.
- You must have a paid workspace, it can be on the cheapest (starter) tier. You can start with single user but may need to add more users depending on your concurrent bot usage.
- The name of the workspace account will be used as the name of the bot (Everyone will know your bot by this name!!) We recommend setting this to the name of your company.
Setup SSO Profile
Create an RSA private key and self-signed certificate. Store these files somewhere safe! They will be needed in later steps!
openssl req -x509 -newkey rsa:2048 -keyout key.pem -out cert.pem -sha256 -days 3650 -nodes
Run the command above in your terminal to generate the private key and certificate (`key.pem` and `cert.pem` respectively)
Go to Google Admin Console SSO profile page with your Google Workspace account to setup the Google SSO profile following the instructions on the image below. Copy the sign-in and sign-out URLs to your clipboard to avoid typos.

SSO Profile Configuration:
-
Sign-in page URL:
https://charlybot.com/api/bot/gmeet-sign-in/ -
Sign-out page URL:
https://charlybot.com/api/bot/gmeet-sign-out/ - Upload your .pem certificate file.
- Check the 'Use a domain specific issuer' box
- Check the 'Enable legacy SSO profile' box
Step 4: Create a new Google Login
Now you can start adding logins(Google accounts) to the login group(created in Step 2) using the Create Google Login endpoint
Create a new Google Login (Use the .pem files created in Step 3)
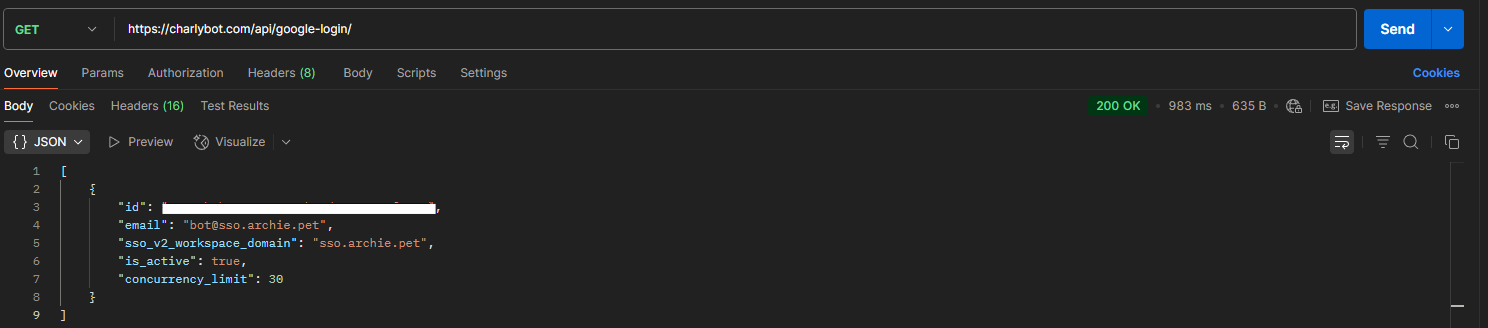
group_id- Set this to the id of the login group created in Step 1sso_v2_workspace_domain- Set this to the domain of the Google workspace created in Step 3sso_v2_private_key- Set this to the private key you generated in Step 3sso_v2_cert- Set this to the cert you generated & uploaded in Step 3email- Set this to the email account you created the Google workspace with (e.g [email protected])is_active- Set this to true to enable this login to be used by the login group
We recommend calling this endpoints using Postman, we made it easy for you.
Just set the API Key you received in Step 1 securely in Postman vault and start testing.

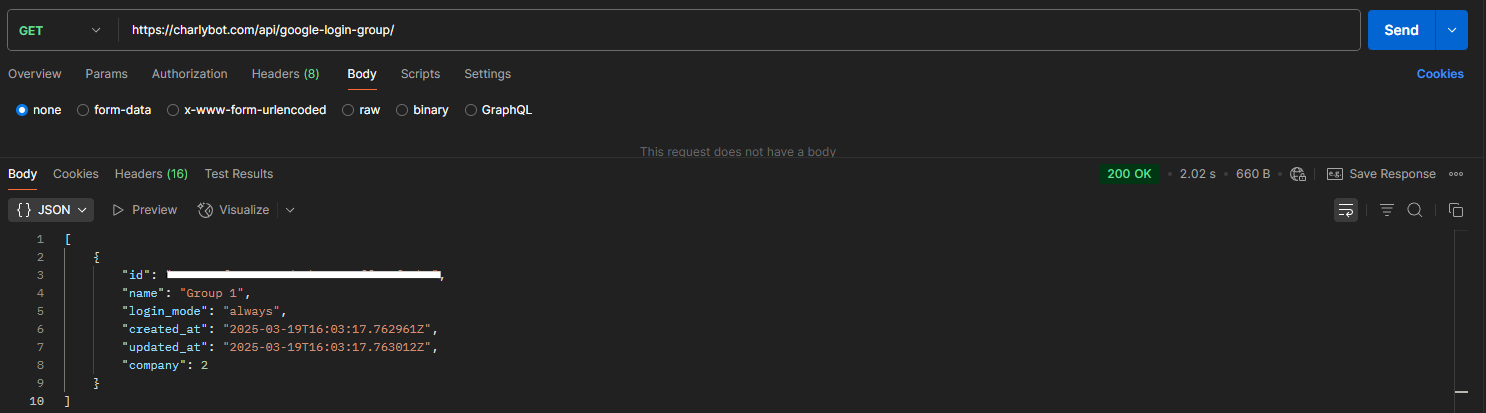
Verify that everything has been configured correctly using the Postman collection or the endpoints directly.
Login Group Response: Test with Postman here
Now you can start recording your Meet Calls, you only need to deploy a bot